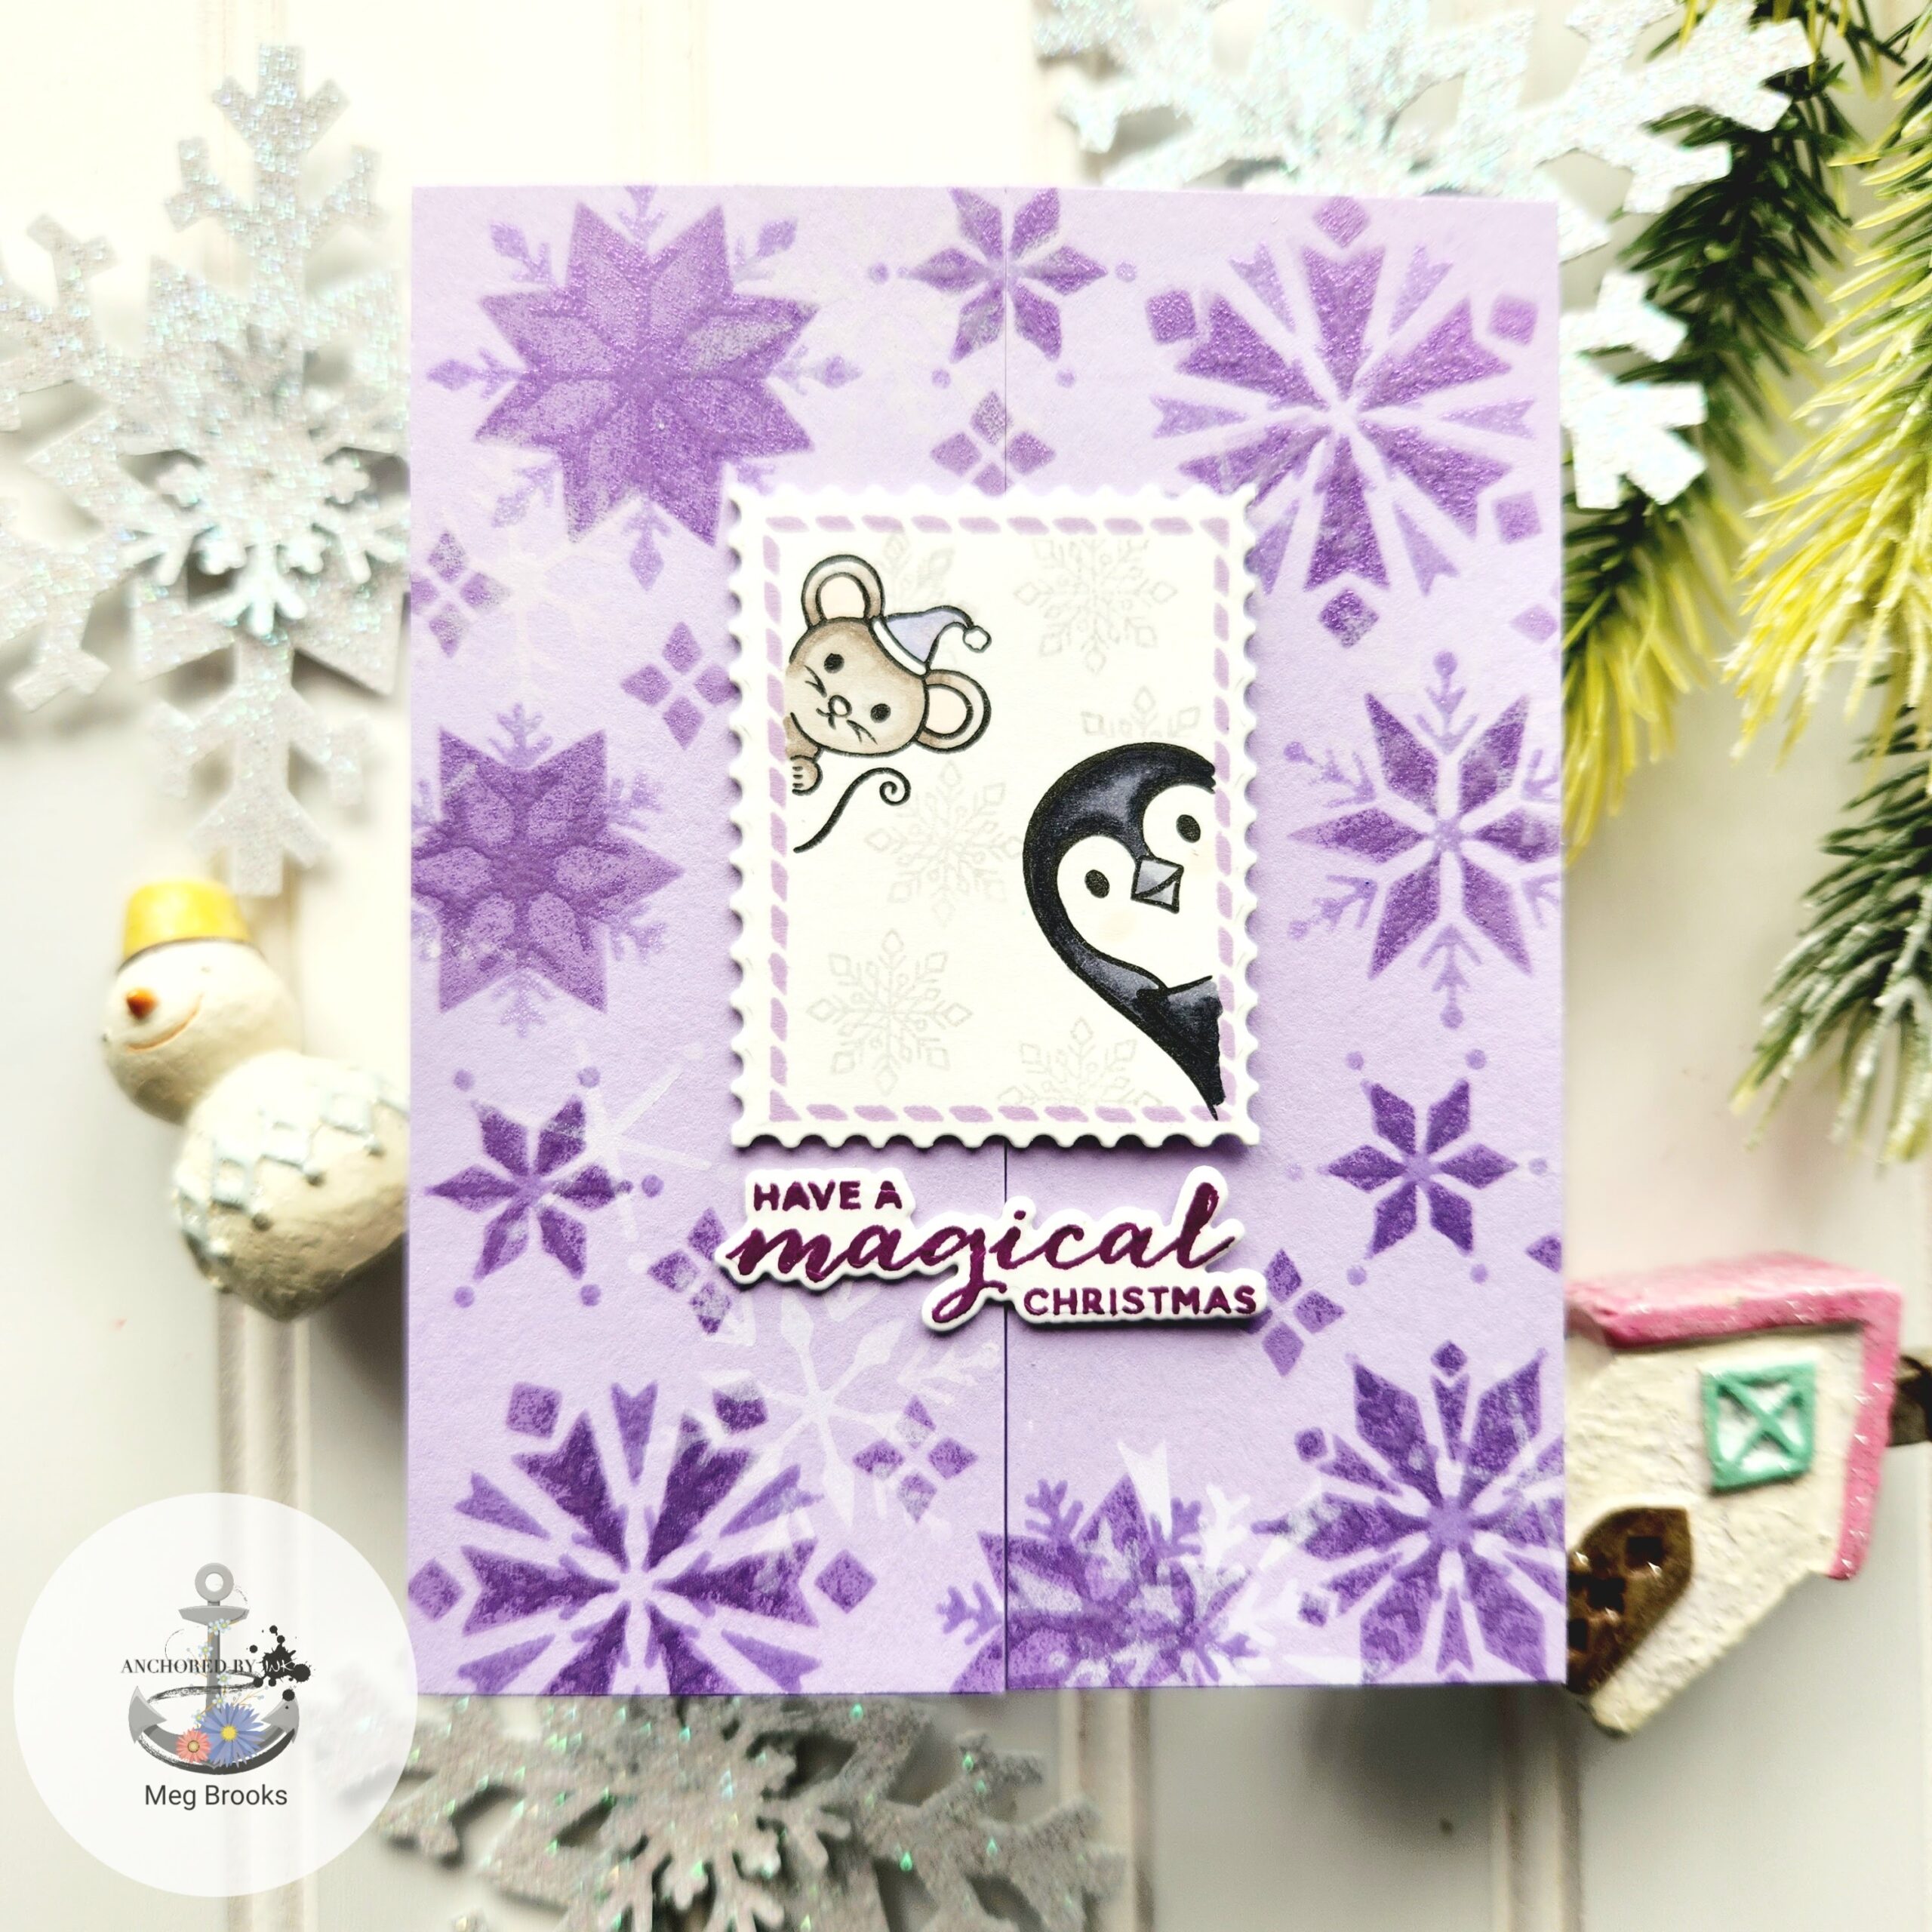
Hello crafty friends! Today is the release day for the Hero Arts My Monthly Hero for November. It is really giving me some Harry Potter vibes along with some wintery goodness. I have a few inspirational cards to show you today but first, lets take a look at the Classic and Premium kits!

CLASSIC
• Mail Art Clear Stamp Set, 6″ x 8″
• 28 Coordinating Dies
• 2 Postage Stamp Frame Fancy Dies
• 1 Sheet of Message Hero Transfers, 6″ x 8″
• 27 Assorted Envelopes in Red, Kraft and White (A1, A2, A7 sizes)
• 10 Sheets of Blank Washi Sticker Paper, 6″ x 6″
• 4 Wax Seal Stickers
Are you ready to spread some joy and holiday cheer? Our November release makes creating adorable cards and envelopes a breeze. The kit includes a delightful collection of stamps and matching dies featuring charming owls and other creatures, ready to take flight into the hearts of your friends and family. The message rub-on transfer sheet makes adding a sentiment quick and easy. Wax stickers, 10 sheets of blank washi paper, and a generous assortment of envelopes in various colors and sizes complete the Classic kit.

PREMIUM
• Mail Art Clear Stamp Set, 6″ x 8″
• Peeking Critters Clear Stamp Set, 3″ x 4″
• 28 Coordinating Dies
• 2 Postage Stamp Frame Fancy Dies
• 2 Color Layering Snowflake Stencils, 5.25″ x 6.5″
• 1 Sheet of Message Hero Transfers, 6″ x 8″
• 2 Sheets of Gift Hero Transfers, 6″ x 8″
• 2 Ink Cubes (Pool Party Reactive Ink, Mist Core Ink)
• 27 Assorted Envelopes in Red, Kraft and White (A1, A2, A7 sizes)
• 10 Sheets of Blank Washi Sticker Paper, 6″ x 6″
• 4 Wax Seal Stickers
Are you ready to spread some joy and holiday cheer? Our November release makes creating adorable cards and envelopes a breeze. The kit includes a delightful collection of stamps and matching dies featuring charming owls and other creatures, ready to take flight into the hearts of your friends and family. The message rub-on transfer sheet makes adding a sentiment quick and easy. Wax stickers, 10 sheets of blank washi paper, and a generous assortment of envelopes in various colors and sizes complete the holiday feeling. The Premium kit also includes a set of two color layering snowflake stencils, two colorful gift-themed rub-on transfer sheets, and two pigment ink cubes. There is also an adorable 3” x 4” clear stamp set with peeking animals ready to decorate both your cards and envelopes.
How adorable are those little mice?! These kits have some wonderful images and sentiments perfect for those envelopes included in the kits. Before I get to my card examples, I just wanted to say that this will be my last guest spot for the MMH blog hops. I am sad but I’m also so excited to see what Hero Arts has planned for their expanded creative team. I’m looking forward to all the inspiration the team will have. But have no fear…you can subscribe to my blog to still see posts from me. And who knows where I’ll show up next (wink wink). I have some opportunities in the future but, I am just not allowed to share them yet. Stay tuned! Now on to the cards!
MMH Classic Kit:

Step By Step Instructions:
- Cut a panel of white cardstock to 4 1/4 by 5 1/2 inches.
- Die cut an opening using the Arches Infinity die. Stamp sentiment at the bottom. Set panel aside.
- Using Paradise cardstock, cut a panel slightly smaller than 4 1/4 by 5 1/2 inches. Ink blend using Bermuda and Paradise ink.
- Stamp snowflakes onto the back ground with white pigment ink. Use the extra with a small amount of water and splatter for a snowy effect.
- While blue panel is drying, stamp and die cut the images from the classic kit. Color using your favorite medium (I used alcohol markers).
- Adhere Paradise panel to the white window card front using liquid glue.
- Arrange images in the window opening. *Tip* You may want to cut extra images to layer behind your colored images. This will ensure they will be supported and even on the card front.
- Add finished card front to a top folding A2 card base.

MMH Premium Kit:

Step By Step Instructions:
- Cut a panel of cardstock to 5 1/2 by 8 1/2 inches. Score and fold from both sides at 2 1/8 inches. Set card base aside.
- Using the same purple cardstock, ink blend Passion Flower ink through the 1st Snowflake stencil.
- Apply embossing ink through the 2nd stencil using a domed foam applicator. Add Iridescent purple embossing powder and heat set.
- Off set 2nd stencil and add Unicorn Pigment ink.
- Ensure panel is dry and cut in the middle. Apply onto the card base.
- Die cut the largest stamp image 3 times. Stamp the edge image with Passion flower ink onto one of the die cuts.
- Stamp the penguin and mouse images peeking from the sides with black ink.
- Add snowflakes with contour ink onto the background. (You may need to mask the animal images slightly or just stamp around them.)
- Color images using your favorite medium.
- Adhere all die cut stamp images together and adhere to the card base using liquid glue to the left side only.
- Stamp the sentiment in Grape Juice ink and die cut. I added extra die cuts for added stability and strength.
- Adhere the sentiment below the “stamp” apply glue to the left side only.

Supply List:

| GIVEAWAY: | We will give away a $50 gift card, drawn from the comments left across the hop. Enter by Sunday, November 12th at 11:59pm Pacific, and the winner will be announced on the Hero Arts blog the following week. | ||
You can start at the beginning of the hop by starting at the Hero Arts Blog or you can go to the next person on the hop which is Kelly Taylor. Have fun with all the inspiration and thank you so much for visiting me today!


17 responses to “Hero Arts My Monthly Hero November 2023 Blog Hop And Giveaway”
[…] Meg Brooks […]
[…] Meg Brooks […]
I love the purple! The critters are darling!
I love the scene you created for your owl card.
Purple snowflakes are so pretty
Your cards are so cute 😍 I love the bright colors you’ve used for the backgrounds! Great job and Goodluck with your next adventure ♥️♥️♥️
Awesome cards! I love the sweet peeking critters and snowflakes, and your owl card is beautiful!
Great cards….love the colors of the snowflake background!!
Such adorable cards! I really love the arch window for your mailbox scene!
Love the cards especially the postage/snowflake card. So cute.
Such fun!
The peeking critters are so cute. I love your colors, too.
Cute cards! I love the purple background!
So cute!
Love this kit and love your beautiful, fun cards!
Both of these cards are adorable.
Great cards! I love the critters! So cute!